🥕 Vegetables
How to Grow Tomatoes at Home in the UK
Beginner's guide to growing tomatoes in the UK — sowing, potting on, planting out, training cordons, watering, high-potash feeding and a heavy harvest.
Some links on this page are affiliate links. If you buy through them we may earn a small commission, at no extra cost to you. We only recommend things we think are genuinely useful for home growers.
The short version
- Sow indoors February–April at 18–21°C; pot on into 9cm pots at the true-leaf stage.
- Plant out only after the last frost (late May), once nights stay above 10°C.
- Pick a habit: tall cordons for greenhouses and big crops; bush types for pots and baskets.
- Water consistently — erratic watering causes splitting and blossom end rot.
- Feed weekly with a high-potash feed the moment the first flowers open.
- Pinch out sideshoots on cordons, and stop the plant in August so the fruit you have can ripen.
Tomatoes are the crop that turns people into gardeners. They are generous, forgiving of a few beginner mistakes, and they taste so unlike a supermarket tomato that the first homegrown one of the season is a genuine event. You do not need an allotment or a greenhouse to grow them either — a couple of plants in a growbag on a sunny patio, or a bush variety tumbling out of a hanging basket, will keep a household in tomatoes from July to the first frosts. They are the obvious place to start if you are growing food for the first time.
There is a bit more to a tomato than to a row of carrots — sowing, potting on, hardening off, supporting, feeding — but none of it is difficult, and most of it is genuinely enjoyable. This guide walks through the whole journey, from a seed on the windowsill in February to a glut of fruit in September. If you are tight on space, our companion guide to growing tomatoes in pots goes deeper on container growing, and watering and feeding tomatoes covers the make-or-break details in full.
Quick UK timing
Sow indoors late February–April. Pot on through April. Harden off and plant out after the last frost, late May–early June. Harvest July–October. In the north and in cold springs, lean later for outdoor plants and earlier under glass.
Cordon or bush? Choosing a growth habit
Before you even think about flavour, you need to know which of two growth habits your variety has, because it changes how you grow, space and support the plant. The seed packet will tell you, usually in these words.
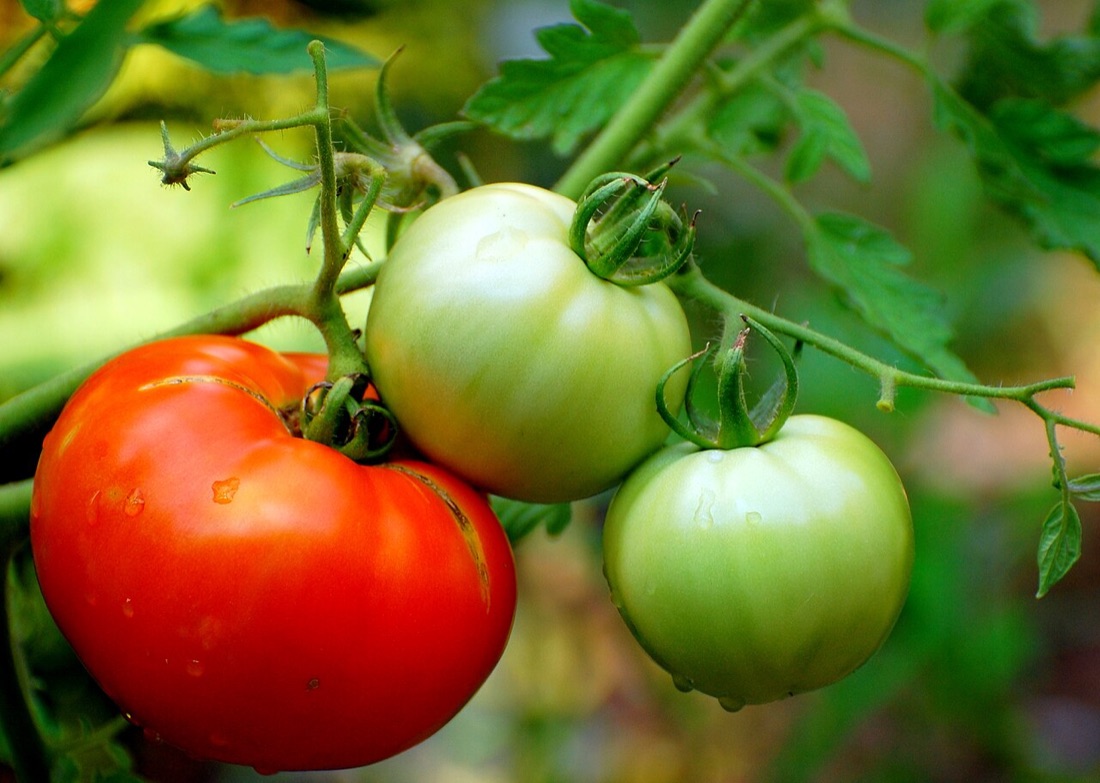
Cordon (also called indeterminate) plants grow as a single tall stem that keeps extending upwards all season — left alone, a greenhouse cordon can reach two metres or more. You grow them up a cane or string, remove the sideshoots, and harvest a long succession of trusses up the stem. Cordons give the biggest crops and are the classic choice for a greenhouse, but they also do well outdoors against a sunny wall. Most of the famous varieties — Gardener's Delight, Sungold, Shirley, Alicante — are cordons. If you are unsure, this is the habit you will most often be growing.
Bush (also called determinate) plants are naturally compact and stop growing once they reach a certain size, producing all their fruit over a shorter window. They sprawl rather than climb, need little or no pruning, and never need their sideshoots removed. This makes them perfect for pots, growbags and hanging baskets where a tall cordon would be a nuisance. Tumbling Tom, Tumbler and Maskotka are tumbling bush types bred for baskets; Roma is an upright bush plum.
Match the habit to your space
Greenhouse or a tall, sheltered sunny spot? Grow cordons for the heaviest crop. A balcony, a windowbox or a hanging basket? Grow bush types and skip the pruning entirely. Getting this one choice right saves a lot of fiddling later.
Choosing a variety
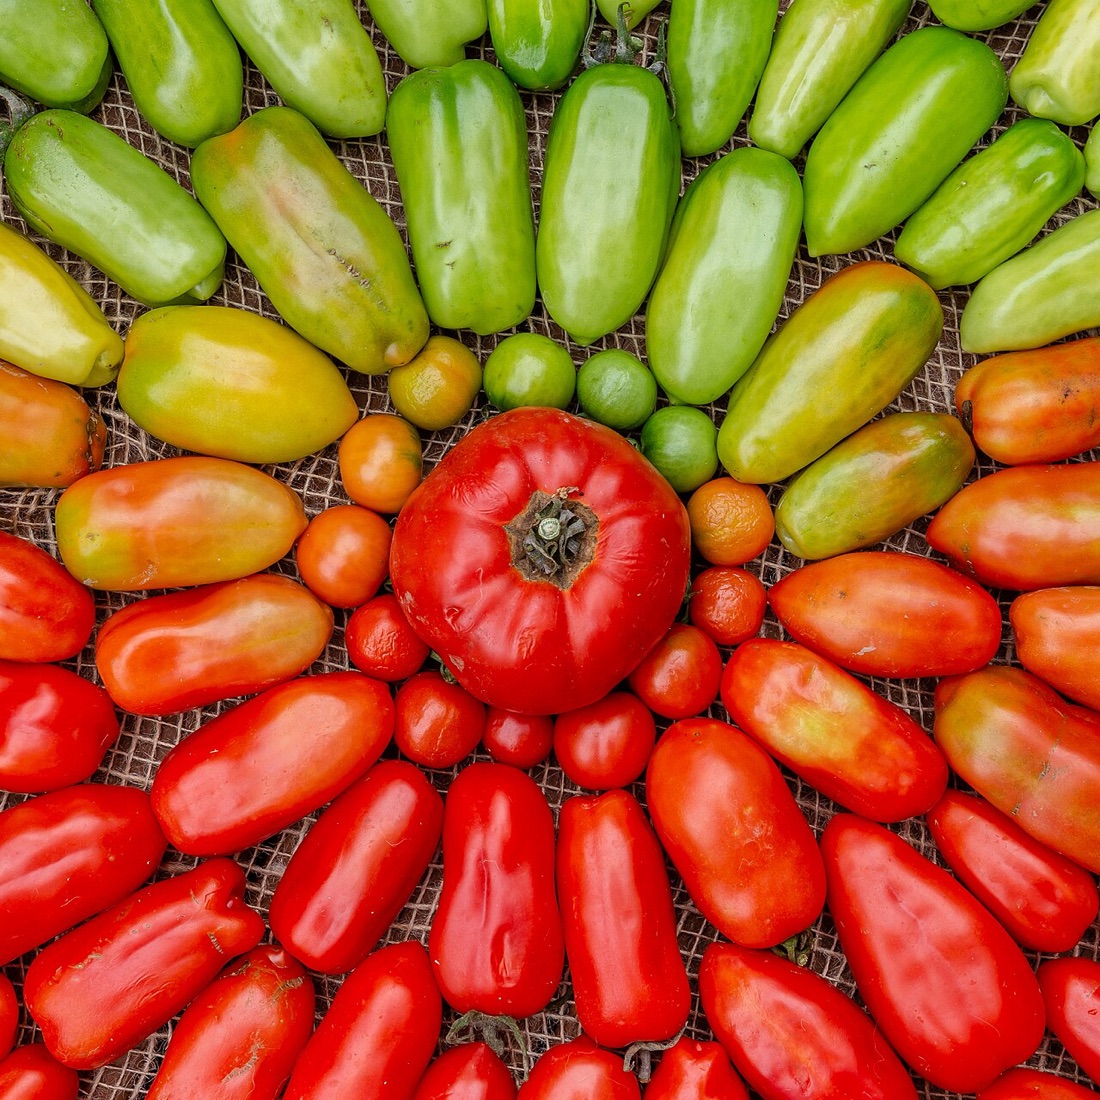
Within those two habits there is a whole world of tomatoes, and half the fun of growing your own is picking varieties you will never see in a shop. Our full tomato varieties guide goes into much more depth, but here are the broad types.
Cherry tomatoes are small, sweet and the most reliable for beginners — they ripen early and crop heavily even in a poor summer. Sungold (an orange cherry of almost ridiculous sweetness) and Gardener's Delight are the two most-loved cherry cordons in Britain.
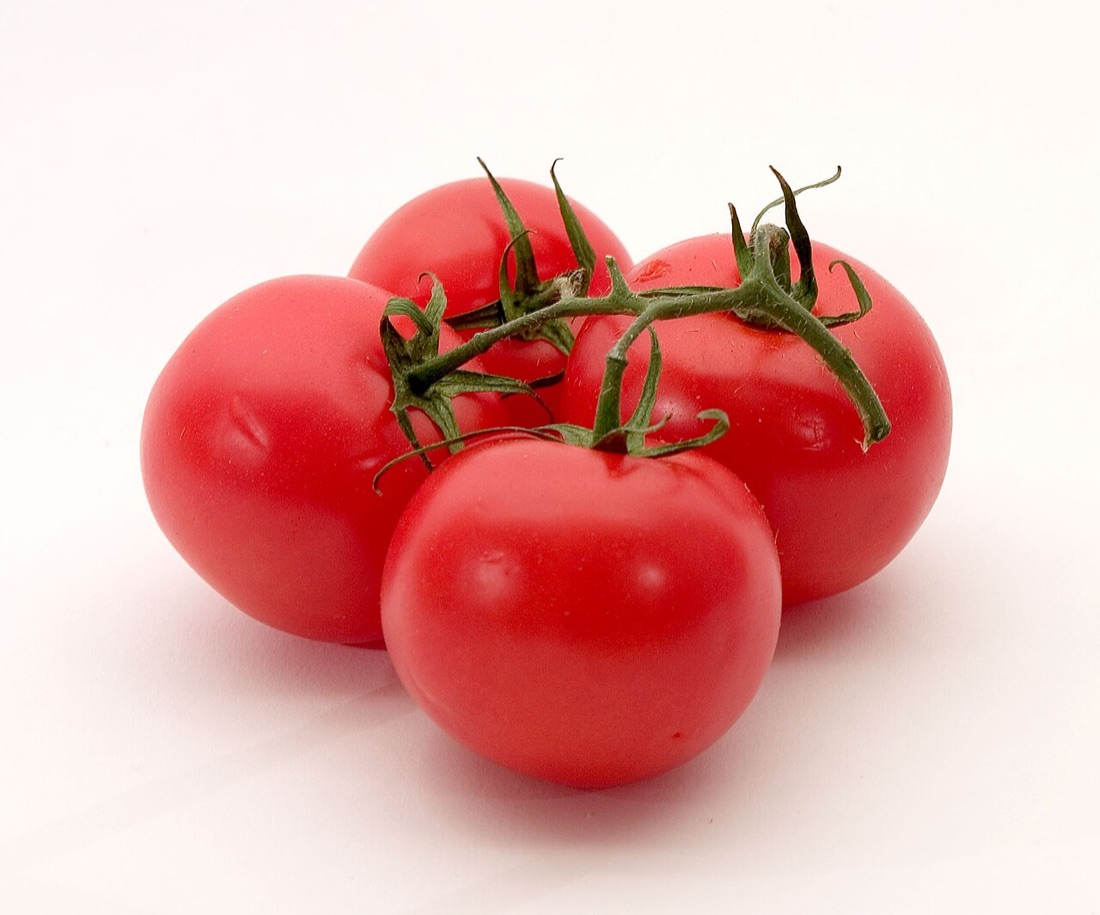
Salad tomatoes are the medium, round, all-rounder fruits for sandwiches and salads. Alicante and Shirley are dependable salad cordons that crop well outdoors and under glass.
Plum tomatoes are oval and meaty, with fewer seeds — the type to grow if you want to cook down sauces and passata. Roma is the classic bush plum; San Marzano is the famous Italian sauce variety.
Beefsteak tomatoes are the big, ribbed slicers — one fruit can fill a burger bun. They need warmth and a long season, so they do best in a greenhouse in the UK. Marmande and Country Taste are good choices.
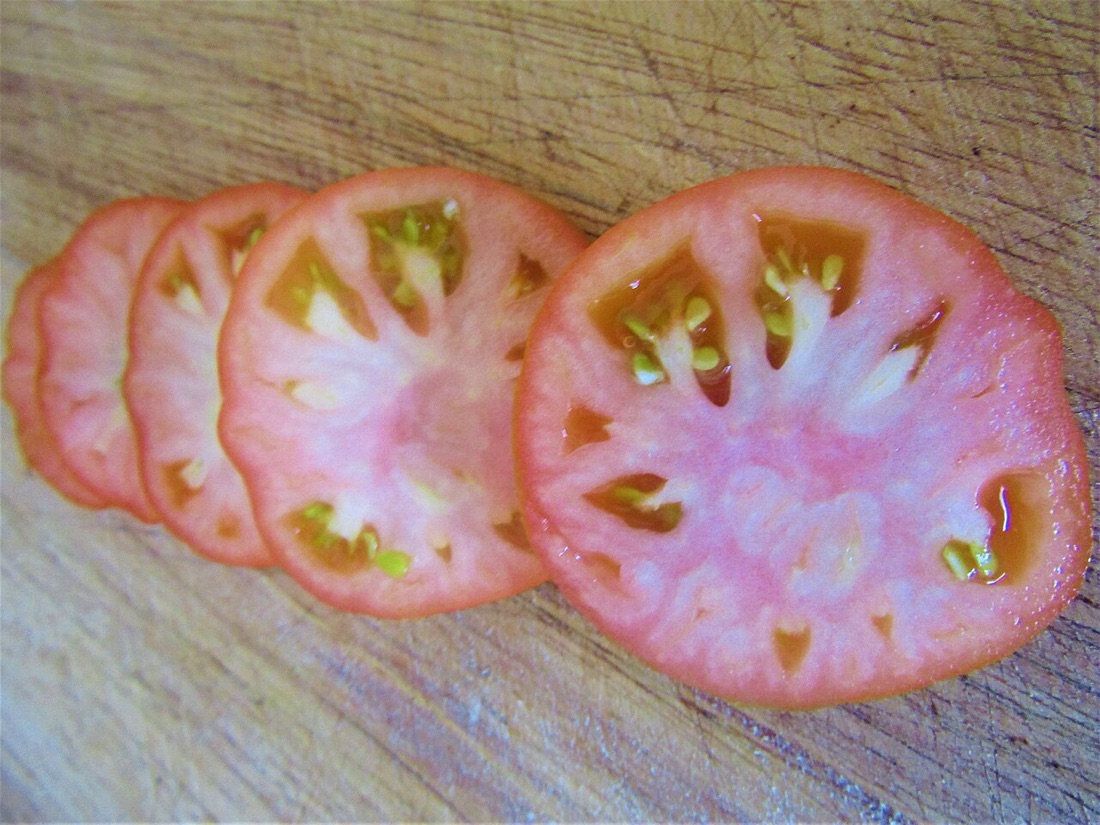
Then there is the F1 hybrid versus heirloom question. F1 hybrids are bred for vigour, disease resistance and reliable, uniform crops — a safe choice for a first year. Heirloom (open-pollinated) varieties such as Brandywine or Black Krim often have extraordinary flavour and let you save your own seed, but they can be more temperamental.
Blight is worth planning for. If you garden outdoors in a wet part of the country, tomato blight can flatten a crop overnight in a humid August. The single best defence is a blight-resistant variety — Crimson Crush (a large red beefsteak-type) and Mountain Magic (a cordon cocktail tomato) shrug off the disease that wipes out ordinary plants. For an outdoor crop these are well worth the seed money.
You can buy seed from Suttons, Thompson & Morgan, Dobies and Crocus.
Ready to grow tomato?
We recommend the Sungold variety to start with. Grab a packet and get sowing.
Sowing indoors
Tomatoes are tender — a touch of frost kills them — so in the UK they are always started off indoors and planted out once spring is reliably over.
When to sow depends on where the plants will end up. For a heated greenhouse, sow as early as late February. For an unheated greenhouse or polytunnel, sow in March. For plants going outdoors, sow in late March to early April — sow too early and you will be stuck nursing leggy, root-bound plants on a windowsill for weeks before it is warm enough to plant them out. The planting calendar will help you settle on a date for your area.
How to sow: fill small pots or a seed tray with peat-free seed compost, firm it gently and water. Scatter the seed thinly across the surface and cover with about 1cm of compost or fine vermiculite. Label everything — tomato seedlings all look identical. Keep the pots at a steady 18–21°C: a warm windowsill, an airing cupboard (move into light the moment they germinate), or a heated propagator all work. Seedlings should appear in 7–14 days.
As soon as they are up, light is everything. A windowsill seedling will lean hard towards the glass and grow pale and stretched; turn the pots daily and give them the brightest spot you have. A small windowsill propagator with a clear lid keeps the warmth and humidity steady in those first weeks.
Potting on, then hardening off
Once each seedling has its first pair of true leaves (the second set, which look like proper tomato leaves rather than the smooth seed leaves), it needs more room.
Pot on each seedling into its own 9cm pot of peat-free multipurpose compost. Handle seedlings by a leaf, never the fragile stem, and bury the stem a little deeper than it was — tomatoes are unusual in that they root all the way along a buried stem, so this gives you a stronger plant. Keep them somewhere bright and frost-free and water whenever the surface dries. As they grow, a healthy plant should be sturdy and dark green; pot on again into a 1-litre pot if it outgrows the 9cm one before planting-out weather arrives.
Harden off before they go out for good. Plants raised indoors are soft and need a week to ten days to toughen up, or the shock of cold nights and wind will check their growth badly. Stand them outside in a sheltered spot during the day and bring them in each night, gradually leaving them out for longer, and finally overnight once frost has passed. A cold frame makes this easy — just prop the lid open by day and close it at night.
Don't rush them outside
Tomatoes hate cold, and a single late frost will kill an unprotected plant. Wait until after your last frost date and until nights are reliably above 10°C — in much of the UK that means late May to early June. Check yours with the frost date checker before you commit a single plant to an outdoor bed.
Where to grow: greenhouse, growbag, pot or open ground
Tomatoes are flexible, and almost any sunny, sheltered spot will give you a crop. Each option has trade-offs.
Greenhouse or polytunnel gives the most reliable results and the longest season. The extra warmth ripens fruit faster, protects against blight (rain-borne spores are kept off the leaves), and lets you grow heat-loving beefsteaks that struggle outdoors. The catch is heat and dryness: a summer greenhouse can hit 35°C, so you must ventilate hard, damp down the floor, and water more often. Grow cordons in the border soil, in large pots, or in growbags on the staging.
Outdoors is perfectly viable for most cherry and salad varieties, and many people prefer the flavour of an outdoor-ripened tomato. Choose the warmest, sunniest, most sheltered spot you have — against a south-facing wall is ideal, as the wall stores heat. The risk outdoors is a wet August bringing blight, so favour blight-resistant or early cherry varieties if your summers are damp.
Growbags are the cheap, cheerful standard — a long plastic bag of compost you lay flat and plant two or three tomatoes into. They warm up fast and suit a patio or greenhouse floor, but they hold little water and dry out alarmingly in hot weather, so they need watching closely. Standing the bag in a growbag tray, or cutting bottomless pots into the top to increase the depth of compost, both help enormously.
Pots and containers give you the most control and let you grow on a balcony or doorstep. Use a pot of at least 30cm (about 10 litres) per plant, filled with peat-free multipurpose compost; bigger is always better, as it dries out more slowly. Bush and tumbling varieties are made for pots and baskets. Our full guide to growing tomatoes in pots covers compost, pot size and watering in detail.
Planting out
Once the plants are hardened off and the frost risk has passed, plant them in their final positions.
Space cordons about 45–60cm apart in a greenhouse border or bed; two per growbag, three at a squeeze. Dig a hole, water it, and set the plant in slightly deeper than it sat in its pot — again, the buried stem will sprout extra roots. Firm gently and water in well. If you are growing cordons, put the support in now, at planting time, so you do not spear the roots later.
For an outdoor crop, choose your sunniest, most sheltered spot, and consider planting through a sheet of black plastic or a thick mulch — both warm the soil and keep moisture steady, which heads off splitting later in the season.
Supporting and training cordons
Cordons need support and a little routine attention; bush types need almost none. This is the part that looks fiddly but quickly becomes a pleasant five-minute weekly job.
Support each cordon with a sturdy 1.5–1.8m cane pushed in beside the plant, or with a length of soft string tied loosely to the base and to a wire overhead (the usual greenhouse method — you wind the growing stem around the string as it climbs). Tie the stem to the cane every 20–30cm with soft twine or plant ties, in a loose figure-of-eight so the tie does not cut into the swelling stem.
Pinch out the sideshoots. This is the key job with cordons. A sideshoot is the small shoot that appears in the "armpit" — the joint between the main stem and a leaf. Left alone, each one grows into a whole extra stem and the plant becomes a congested bush that puts its energy into foliage instead of fruit. Snap or pinch each sideshoot out while it is small, ideally weekly. Do not confuse a sideshoot (which grows from a leaf joint) with a flower truss (which grows straight from the main stem) — never remove the trusses, those are your tomatoes.
Remove lower leaves as the season goes on. Once the lowest trusses are setting fruit, take off the leaves below them to improve airflow and let light and warmth reach the ripening fruit. This also reduces the damp, still conditions that blight loves.
Stop (or "top") the plant in late summer. Around the middle of August, or once a cordon has set four or five trusses outdoors (six or seven under glass), pinch out the growing tip two leaves above the top truss. This stops the plant climbing and forces all its remaining energy into ripening the fruit it already carries — essential in our short season, where late-formed fruit simply never ripens.
One quick job a week
Make Saturday morning your tomato round: tie in the new growth, pinch out any sideshoots, pick what's ripe, and check the watering. Five minutes a week keeps a cordon tidy, healthy and productive all season.
Watering — the thing that matters most
If you do only one thing well, make it watering, because inconsistent moisture is behind the two most common tomato disappointments.
Aim for steady, even moisture — never bone dry, never waterlogged. In the heat of summer a growbag or pot may need watering once or even twice a day; a plant in greenhouse border soil far less. Water the soil, not the leaves, ideally in the morning, and give a good soak rather than a daily splash so the moisture reaches the roots.
Splitting happens when a parched plant suddenly gets a flood of water (or rain): the fruit swells faster than its skin can stretch and bursts. The cure is simply consistency — never let pots dry out completely. Our guide to splitting tomatoes has the full picture.
Blossom end rot — a dark, sunken, leathery patch on the bottom of the fruit — looks like a disease but is really a watering problem. When the soil dries out, the plant cannot move calcium into the developing fruit, and the end collapses. It is not cured by adding calcium; it is cured by keeping the moisture steady. See blossom end rot for more.
A mulch of compost or grass clippings on top of the soil, and a growbag tray or self-watering pot, both make consistent moisture far easier — especially if you are away for a day or two.
Feeding for a heavy crop
A growing tomato is a hungry plant, but the timing of feeding is specific.
For the first few weeks after planting, while the plant is putting on leaf and stem, it needs little or no extra feed if it is in fresh compost. The moment the first flowers open, switch to a weekly feed with a high-potash tomato feed (potash, or potassium, is the nutrient that drives flowering and fruiting — a general high-nitrogen feed at this stage just gives you lush leaves and few tomatoes). Follow the dilution on the bottle and feed once a week, more often in the height of summer for plants in pots and growbags. Our guide to watering and feeding tomatoes breaks down feed types and schedules.
Helping the fruit set
Tomato flowers are self-fertile, but they still need to be shaken or visited to drop their pollen and set fruit. Outdoors, wind and bees do this for you — planting a few pollinator plants nearby brings in the insects and helps the whole patch. In a still greenhouse, give the plants a hand: tap or gently shake the canes or flower trusses around midday on a warm, dry day, or mist the flowers lightly. Good ventilation and a damped-down floor also help, because pollen does not move in cold, damp, stagnant air.
Common problems
Most tomato troubles are quick to diagnose and quick to fix.
Yellowing leaves usually mean overwatering, underfeeding, or cold nights early on. Lower leaves yellowing late in the season is often just age and nothing to worry about — see yellowing tomato leaves to tell the difference.
Blight shows as brown blotches on leaves and stems and quickly rotting fruit, usually after warm, wet weather. There is no cure once it strikes — remove and bin affected plants, and next year grow resistant varieties or move under cover. Read tomato blight for prevention.
Split fruit and blossom end rot are both watering problems, covered above. Flowers dropping without setting is usually down to cold nights, drought, or a stuffy greenhouse — keep things warm, watered and ventilated.
Fruit that stays stubbornly green late in the season is normal in a cool autumn; see ripening tips below and our guide to tomatoes not ripening.
Harvesting and ripening green tomatoes
Pick tomatoes when they are fully coloured and come away from the vine with a gentle twist — the flavour is far better than fruit picked under-ripe. A pair of harvesting snips makes light work of cutting whole trusses cleanly. Pick regularly: the more you take, the more the plant produces.
As the nights cool in autumn, ripening slows and finally stops. Before the first frost, gather all your remaining green and part-ripe tomatoes. They will ripen indoors over the following weeks on a warm windowsill — and a ripe banana in the bowl with them gives off ethylene that speeds the process along. Whatever stays stubbornly green can be turned into green tomato chutney, a homegrown tradition in its own right.
For a sense of how much you might pick, a single healthy cordon can yield 3–4kg of fruit over a season. Use the yield calculator to work out how many plants your household needs.
A simple tomato growing calendar
February — sow seed indoors at 18–21°C for greenhouse plants. Keep on a bright windowsill or in a heated propagator. Use the planting calendar to choose your date.
March — sow for an unheated greenhouse or outdoor crop. Pot on early sowings into 9cm pots at the true-leaf stage. Keep everything bright, warm and frost-free.
April — pot on again into larger pots if plants are outgrowing their 9cm ones. Begin hardening off plants destined for a greenhouse towards the end of the month.
May — harden off outdoor plants over 7–10 days. Plant out into the greenhouse from mid-month, and outdoors only after your last frost date (late May) — check it with the frost date checker. Put supports in at planting time.
June — plants establish and start flowering. Tie in cordons, pinch out sideshoots weekly, and begin weekly high-potash feeding as the first flowers open. Water consistently as the weather warms.
July — the first cherry tomatoes ripen. Keep up the routine: tie in, pinch out, feed, and water — daily in hot weather for pots and growbags. Remove the lower leaves below ripening trusses.
August — peak harvest. Stop (top) cordons by pinching out the growing tip above the top truss so the existing fruit ripens. Watch outdoor plants for the first signs of blight in humid spells.
September — main harvest continues; ripening slows as nights cool. Keep picking. Remove any blighted material promptly.
October — before the first frost, gather all remaining green tomatoes to ripen indoors, and clear away spent plants. Save seed from any heirloom favourites.
What to grow alongside tomatoes
Tomatoes are good company in the garden. A few pollinator plants — calendula, borage or nasturtiums — near your plants draw in the bees and hoverflies that help the flowers set and keep aphids in check. Basil and French marigolds are the classic companions in a greenhouse, both said to deter whitefly while making excellent neighbours for the kitchen.
If this is your first proper growing year, slot tomatoes alongside a crop of easy potatoes — just keep the two apart, as both can catch the same blight, so never grow them right next to each other outdoors. And once you have the tomato routine down, our deeper dives into tomato varieties, growing tomatoes in pots and watering and feeding tomatoes will help you push for an even heavier, tastier crop next season.
Key terms in this guide
- Cordon
- — A plant trained and pruned to a single main stem — used for tall tomatoes grown up a cane, and for space-saving fruit trees grown at an angle.
- Determinate vs indeterminate
- — Bush (determinate) plants grow to a set size and crop in a flush; cordon (indeterminate) types keep growing and fruiting — a key distinction in tomatoes.
- F1 hybrid
- — A first-generation seed produced by crossing two specific parent plants, giving vigorous, uniform, reliable plants — but seed saved from them will not come true.
- Hardening off
- — Gradually acclimatising indoor-raised seedlings to outdoor conditions over 7–10 days before planting them out, so the shock of wind, sun and cold does not check or kill them.
- Blight
- — A fast-spreading disease (Phytophthora infestans) that rots the leaves, stems and fruit of potatoes and tomatoes in warm, wet weather.
- Blossom end rot
- — A dark, sunken patch at the base of tomatoes, courgettes and peppers, caused by calcium failing to reach the fruit, usually from erratic watering.
Useful tools for this
Frequently asked questions
When should I sow tomato seeds in the UK?
Do tomatoes need a greenhouse in the UK?
Why are my tomato leaves turning yellow?
Why do my tomatoes split before they ripen?
What is the dark, sunken patch on the bottom of my tomatoes?
Should I pinch out tomato sideshoots?
Keep reading
Growing Tomatoes in Pots & Containers
How to grow tomatoes in pots on a UK patio or balcony — container size, compost, deep planting, watering and feeding for a heavy crop in a small space.
The Best Tomato Varieties for UK Gardens
The best tomato varieties for UK gardens — sweet cherry types, reliable cordons, blight-resistant picks and the best tomatoes for pots and patios.
How to Water and Feed Tomatoes for a Heavy Crop
How to water and feed tomatoes in the UK for a heavy crop — how often, how much, when to start high-potash feed, and how to avoid split fruit.