🌱 Getting Started
How to Start a Vegetable Garden at Home in the UK
A beginner's guide to starting a vegetable garden in the UK — choosing what to grow, preparing the soil, and getting your first crops in.
Some links on this page are affiliate links. If you buy through them we may earn a small commission, at no extra cost to you. We only recommend things we think are genuinely useful for home growers.
The short version
- Start small. One raised bed or a few large pots beats a big plot you can't keep up with.
- Pick a sunny spot — 6+ hours of sun, sheltered, near a water source.
- Easiest first crops: salad leaves, courgettes, beans, potatoes and tomatoes.
- The rhythm: sow indoors Feb–April, plant out after the last frost (late May), harvest June–October.
- Avoid the two classic mistakes: skipping hardening off, and watering erratically.
Growing your own food is one of the most satisfying things you can do in a garden — and it is far more straightforward than most beginners expect. This guide walks you through everything you need to get started: choosing a spot, preparing the ground, picking the right crops for year one, and understanding the basic rhythm of a UK growing season. By the end, you will know exactly what to do next.
Quick UK timing
February–April: sow seeds indoors on a warm windowsill. April–May: sow hardy crops directly outside; pot on seedlings started indoors. Late May: plant out tender crops after the last frost. June onwards: water, feed, and enjoy your first harvests. In most of England the last frost falls in late May, though in Scotland and northern England it can stretch into early June.
Where to begin (honestly)
The most common mistake new vegetable gardeners make is trying to do too much at once. You see a garden centre in March, pick up a trolley of seed packets, spend a weekend digging over a large patch, and then realise in July that you've planted far more than you can manage — and far more than you can eat. The weeds have caught up, half the seedlings have been eaten by slugs, and the whole thing feels like a chore.
The better plan is to start small and succeed. A single raised bed, or even two large containers on a patio, is enough for a genuinely rewarding first year. You will make mistakes — everyone does — but they will be contained and recoverable. More importantly, you will harvest something. Real food, from your own patch. That feeling is what keeps people gardening for the rest of their lives.
A good first year looks like this: a few things that worked brilliantly, a couple that were eaten or bolted or never quite germinated, a harvest on the table at least once a week from June through to October, and a list of things to try differently next time. That is not failure — that is gardening.
Choosing the right spot
Most vegetables need at least six hours of direct sun per day to crop well. Tomatoes, courgettes, beans and potatoes all need this. Salad leaves, spinach and some herbs can manage with a little less — three to four hours — but they will still do better in a sunny position.
Walk around your garden or outdoor space at midday in spring and look at where the sun falls. South- and west-facing spots are usually best in the UK. North-facing beds in the shadow of a fence or hedge are rarely suitable for vegetables, unless you are growing only shade-tolerant leaves.
If you have a patio, balcony, or even just a sunny windowsill, do not rule yourself out. A huge amount can be grown in containers — salad, herbs, tomatoes, courgettes, potatoes in bags. If this is your situation, the guide to growing food in containers covers everything you need.
Wind is worth thinking about too. A sheltered spot, close to a wall or fence (but not in its shadow), creates a warmer microclimate that helps tender crops like tomatoes and courgettes get established. Exposed corners of gardens, especially in the north and west of the UK, can batter young plants and slow growth significantly. A simple windbreak — a taut piece of windbreak netting strung along canes — makes a real difference.
Finally, think about water. You will be watering regularly from May through to September. A spot close to an outdoor tap or water butt saves a lot of carrying. A 10-litre watering can gets heavy quickly when you are making twenty trips.
Sorting out your growing space
You have three main options for where to grow your vegetables. Here is an honest look at each.
Raised beds (recommended for beginners)
A raised bed is simply a frame — usually timber — filled with compost and topsoil, sitting on top of your existing ground. They are the recommended starting point for beginners for several reasons.
You control the growing medium entirely. Instead of battling with compacted clay or sandy, nutrient-poor soil, you fill the bed with good-quality compost and you are ready to go. Drainage is excellent. The soil warms up earlier in spring. And — crucially — you never walk on it, so it never gets compacted.
The standard width for a raised bed is 1.2 metres (about four feet). This is deliberate: you can reach the middle from either side without stepping in. Keep beds to this width, and you will never need to stand on your growing soil. Length can be anything — 2.4 metres is a common and practical size, giving you a good growing area without being unwieldy.
Depth matters less than you might think. A 20–25cm depth is enough for most vegetables. Potatoes and parsnips prefer a little deeper — 30cm is better if you can manage it.
For filling, use a mix of good-quality peat-free multi-purpose compost and topsoil. A rough 50:50 mix works well. For a standard 1.2m × 2.4m × 25cm bed, you will need roughly 70–80 litres of compost and a similar volume of topsoil. Expect to spend £50–£80 filling a bed from scratch with bought materials, though adding your own homemade compost will bring costs down over time.
No-dig on open ground
If you want to convert a patch of lawn or an overgrown border without the cost of a raised bed frame, the no-dig method is your friend. The principle is simple: instead of turning the soil, you smother the existing vegetation (grass, weeds, whatever is there) with a thick layer of compost on the surface and let the soil life below do the work of breaking it down.
Lay 8–10cm of compost across the bed surface. You can start sowing and planting into this straight away. The grass and weeds beneath are killed by light exclusion over a few weeks. Worms are stimulated by the rich organic matter on the surface and do the "digging" for you, improving soil structure without any compaction from spade work. The technique also sequesters carbon, improves moisture retention, and builds a healthy soil ecosystem faster than repeated digging.
The only thing to do beforehand is cut down or mow any tall growth so the compost layer sits flush on the ground. For persistent perennial weeds like brambles, dock or bindweed, use a sheet of cardboard beneath the compost as an additional light barrier before the compost layer goes on.
For more on preparing and improving your soil for vegetables, the guide to improving your soil goes into much more detail.
Existing ground or beds
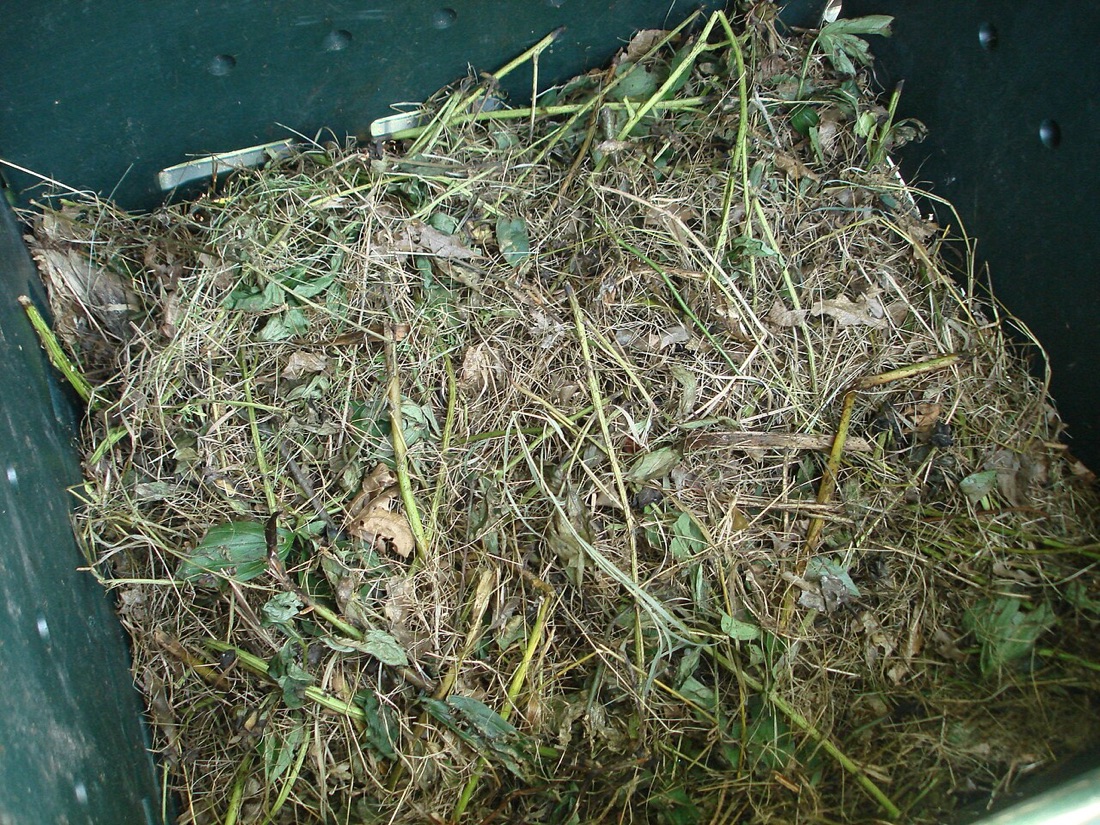
If you already have a dug border or vegetable patch, you are a step ahead. The main jobs are to remove any perennial weeds thoroughly (dig out the roots — do not just chop the tops off), loosen compacted areas with a fork, and add organic matter. Work in a generous layer of compost — at least 5cm — raked or lightly forked into the top of the bed. This improves the tilth (the fine, crumbly surface texture that seeds need to germinate well) and feeds the soil for the season ahead. You can produce your own from kitchen and garden waste — see the guide to making compost.
What to grow in year one
Five crops stand out as reliable, satisfying, and kind to beginners. Grow these in year one and you will have food on the table from June to October.
1. Salad leaves and lettuce
Salad leaves and lettuce are the fastest way to get something edible from your garden. Sow a short row or sprinkle seeds across a module tray and you can be cutting baby leaves in as little as three to four weeks. Many varieties are cut-and-come-again — you harvest the outer leaves and the plant keeps producing new ones — so a single sowing keeps you in salad for months.
They need very little space, tolerate partial shade better than most crops, and succeed in pots on a windowsill or balcony as easily as in a bed. Perfect for giving beginners a quick win while waiting for slower crops to develop.
2. Courgettes
Courgettes are one of the most prolific crops you can grow — sometimes alarmingly so. A single plant, in good soil with regular water, can produce enough courgettes to feed a small household from July through to the first frost. Sow two seeds on their sides into a 9cm pot in late April, keep on a warm windowsill, thin to one seedling per pot, and plant out in late May after hardening off.
Their pace of growth is deeply satisfying for new gardeners. A plant that looks small one week can double in size the next. Children are particularly impressed — if you have young helpers, getting kids growing has plenty of easy projects to share.
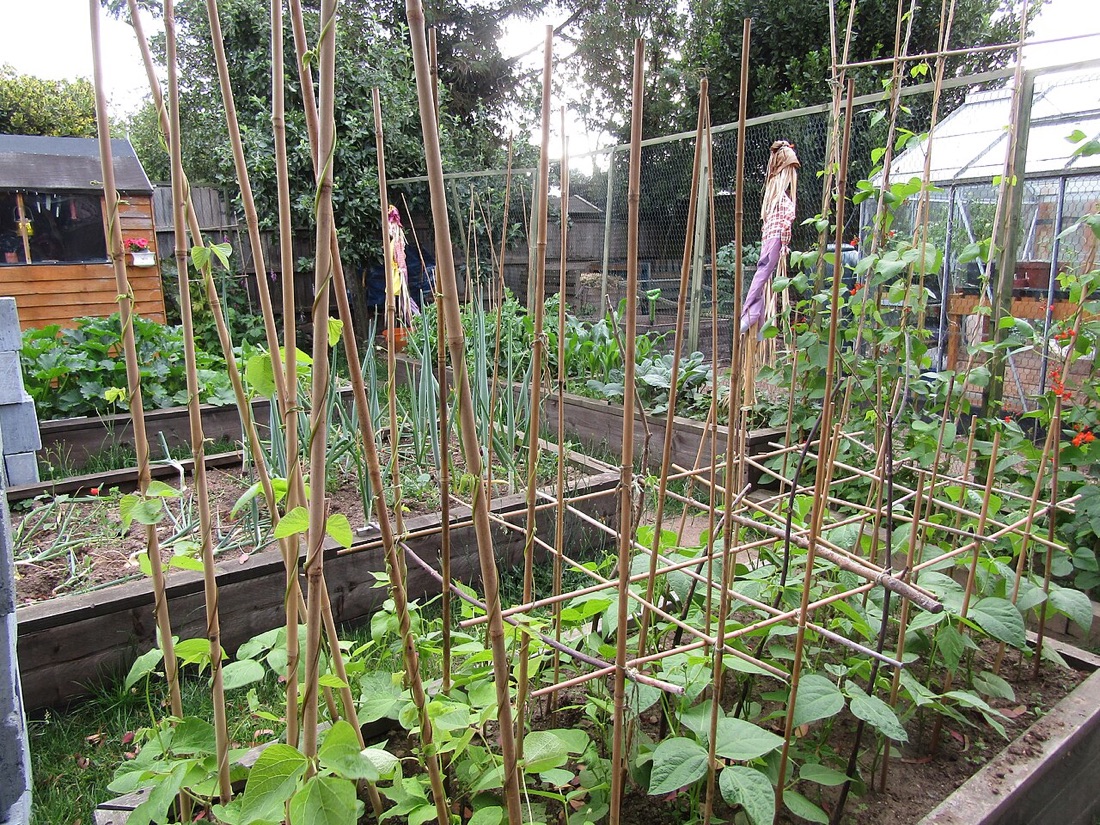
3. Runner beans and French beans
Beans are fast-growing, reliable, and — once they start — unstoppable. Runner beans put on dramatic height (they can reach 2.5 metres up a cane wigwam) and the bright orange flowers are attractive even before the beans appear. French (dwarf) beans are lower-maintenance — no staking needed — and equally productive.
Sow directly into warm soil from late May, or start in pots in late April for planting out after the last frost. Within two months of sowing, you will be picking beans every few days. Explore the full growing guide for beans once you are ready to go deeper.
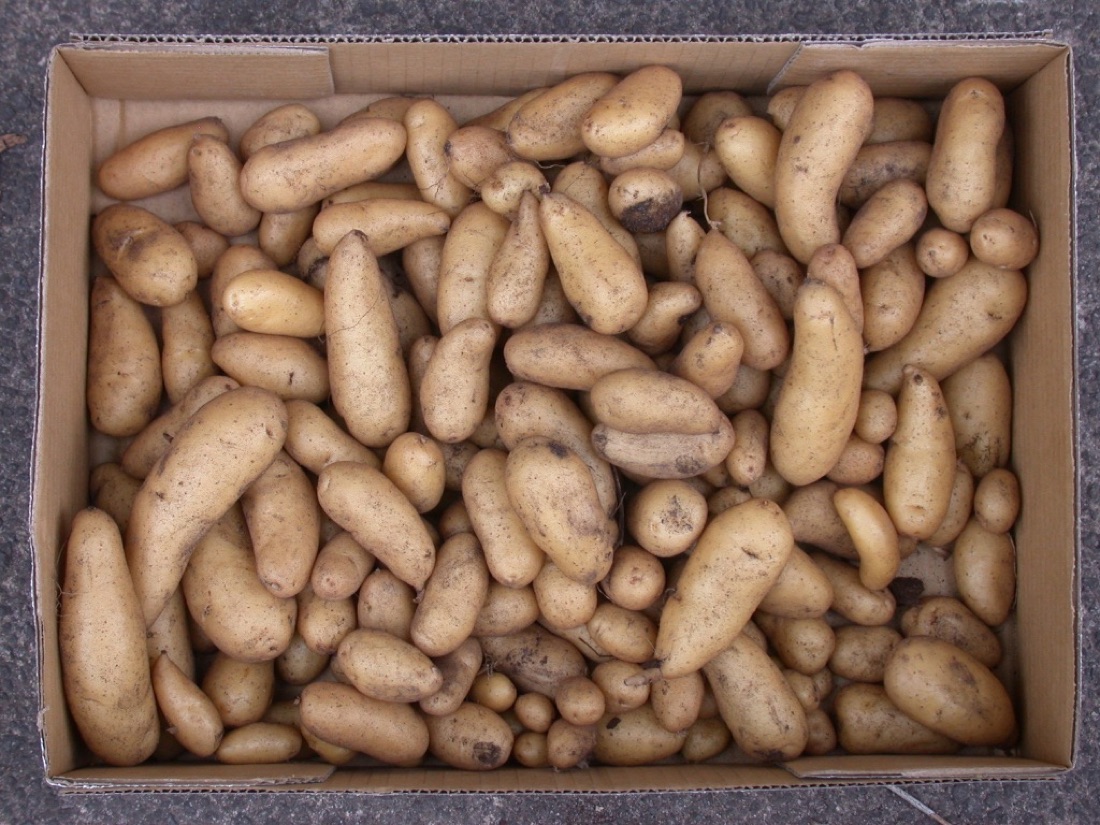
4. Potatoes
Potatoes are classically recommended for breaking in new ground — their extensive root systems help loosen and improve soil structure, and earthing up the plants as they grow smothers weeds effectively. There is also something particularly satisfying about harvesting potatoes: pushing a fork into the soil and finding a clutch of new tubers feels like treasure hunting.
Plant chitted (sprouted) seed potatoes from mid-March (earlies) or April (maincrop). Earlies are ready to dig around June or July, giving you new potatoes at their absolute best — the difference between a homegrown new potato and a shop-bought one is considerable.
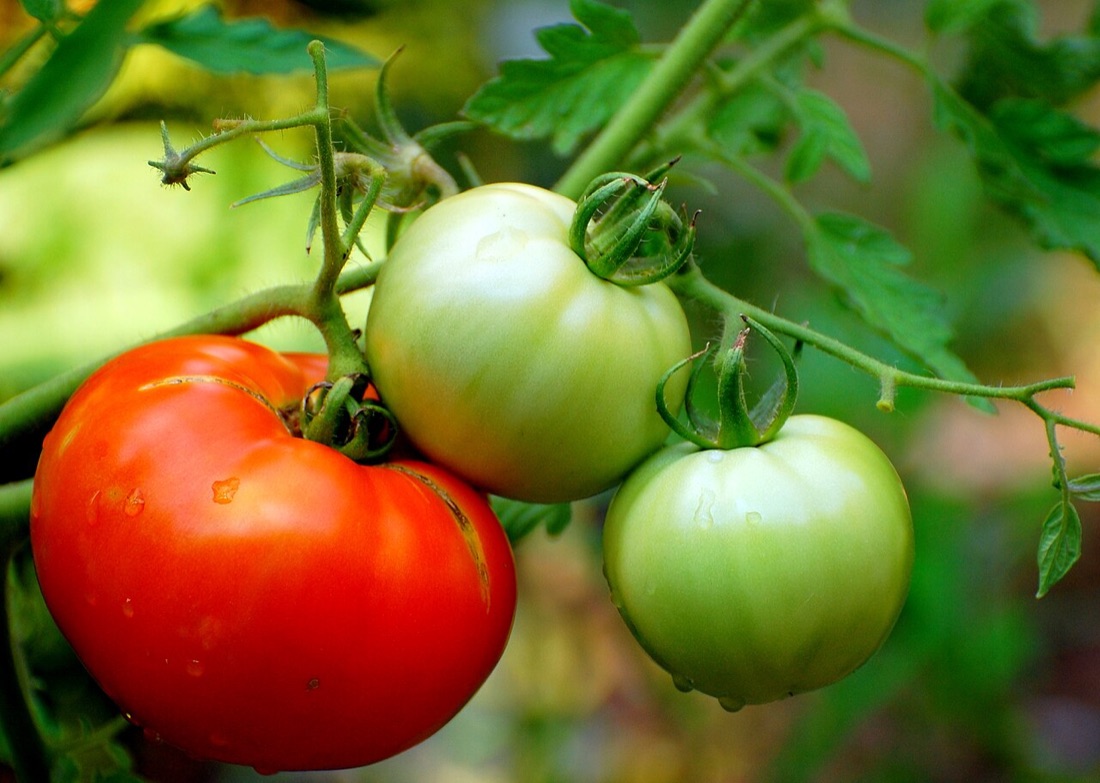
5. Tomatoes
Tomatoes are the crop almost every new gardener most wants to grow, and for good reason: the flavour of a homegrown tomato picked warm from the vine bears almost no resemblance to a supermarket one. Start seeds in late February or March on a south-facing windowsill at around 18–21°C. Pot on into 9cm pots once true leaves appear, then into larger containers. Plant outside after the last frost — late May in most of England, or into an unheated greenhouse or polytunnel earlier.
If you are short of garden space, tomatoes are brilliant in containers; a guide to growing tomatoes in pots covers everything you need for a patio or balcony crop.
How to sow seeds (the basics)
Growing from seed is satisfying, economical, and gives you access to a far wider range of varieties than you will ever find as plug plants. The principles are straightforward.
Seed compost vs potting compost. Use seed compost for germination — it is finer-textured and low in nutrients, which encourages seedlings to develop good root systems as they search for feed. Potting compost (or multi-purpose) is too rich for seeds but perfect for potting seedlings on once they are a few centimetres tall.
Containers. Seed trays work well for small seeds (lettuce, salad leaves) that you will prick out individually later. Module trays — trays divided into individual cells — are better for larger seeds (courgettes, beans, cucumbers) or for any seed where you want to avoid disturbing roots at transplanting time. Fill them level with seed compost, tap to settle, and water gently before sowing.
Depth. The general rule is to sow at a depth twice the diameter of the seed. Tiny seeds like lettuce are barely covered — just press them gently into the surface. Larger seeds like beans and courgettes go in 2–3cm deep. Always sow two seeds per module and thin to the strongest once they have germinated.
Warmth. Most seeds germinate best at 18–21°C. A south-facing windowsill in March is ideal for tomatoes, peppers and courgettes. Cooler rooms work for hardier crops like lettuce and brassicas. A propagator with a heated base gives you more control and speeds things up by a week or two.
Bottom watering. Rather than watering over the top of seed trays (which can wash seeds about or compact the compost surface), set the trays in a shallow tray of water and let the compost soak it up from below. This is gentler and produces better germination.
After germination. Once seedlings appear, move them to a bright windowsill immediately — insufficient light at this stage is what causes the leggy, stretched seedlings that then struggle outside. Thin modules to one seedling once they are clearly established, nipping out the weaker seedling rather than pulling it (pulling can disturb the root of the one you are keeping).
Hardening off. This is the step that beginners most often skip — and the one that causes the most losses. Seedlings grown indoors are not acclimatised to outdoor conditions: wind, temperature fluctuation, direct sunlight intensity. Move them outside in their pots for a few hours on a mild day, bringing them back in at night. Increase the time outdoors over 7–10 days until they are out all day and all night. Only then are they ready to plant permanently outside. Skipping this step and planting straight from windowsill to soil can result in scorched, wilted plants or transplant shock.
Planning your season
Understanding the rhythm of the UK gardening year stops a lot of confusion. Here is a simple overview month by month.
February: Sow tomatoes, peppers and chillies indoors on a warm windowsill. The days are still short, but these slow-growing crops benefit from the early start. Check the planting calendar for exact timings.
March: The main indoor sowing month. Sow courgettes, cucumbers, annual herbs, and more tomatoes. Outside, the soil is beginning to warm but frosts are still likely most nights. You can sow broad beans and peas directly if you have a sheltered spot.
April: Sow French and runner beans indoors in pots. Outside, sow salad leaves, radishes, spinach and carrots directly once the soil feels workable. Plant out plug plants of hardy crops (lettuce, brassicas) after a few days of hardening off.
May: The last frosts pass (use the frost date checker for your area). From late May, plant out tender crops — tomatoes, courgettes, beans, basil. Keep an eye on overnight forecasts and cover plants if a late frost threatens.
June: Direct sow more salad, beans and courgettes for a succession of harvests. Begin regular watering as temperatures rise. First harvests of radishes, salad and early potatoes arrive.
July and August: The main harvesting months. Water container plants daily in dry spells. Feed tomatoes and courgettes weekly with a liquid tomato fertiliser. Pick beans and courgettes regularly to keep the plants cropping.
September and October: Last tomatoes, beans and courgettes before the frosts arrive. Harvest maincrop potatoes and store them. Sow winter salads (lamb's lettuce, rocket, mizuna) for autumn and early winter picking.
November to January: Clear spent plants from beds. Add a layer of compost to the bed surface and leave for winter. Plan next year: browse seed catalogues, note what worked and what to try differently. This is when good years begin.
Common beginner mistakes (and how to avoid them)
Starting too big. You cannot maintain three large beds if you have never grown anything before. One bed or a few containers is always the right call in year one.
Sowing too early. Tomato seeds sown in January in a cool house will produce pale, stretched seedlings that never catch up. Sow tomatoes in late February or March; most other crops in April or May. Cold soil outdoors in March is equally inhospitable — wait until the soil has warmed to at least 7°C before direct sowing most crops (a cheap soil thermometer takes the guesswork out of this).
Forgetting to harden off. As covered above, this is the single most common cause of transplant losses. Take the ten days. It is worth it.
Irregular watering. In hot, dry spells, tomatoes and courgettes need consistent moisture. Let them dry out and then drench them, and you risk split fruits and blossom end rot (a dark, leathery patch on the base of tomatoes or courgettes caused by calcium deficiency triggered by uneven watering). Water little and often, and mulch around the base of plants to retain moisture.
Not feeding containers. Compost in a pot is exhausted of nutrients within six to eight weeks. From that point, container plants need weekly feeding with a balanced liquid fertiliser, switching to a high-potassium tomato feed for fruiting plants. Neglecting this is the main reason for disappointing pot harvests.
Slug damage on seedlings. Slugs are the most consistent threat to young plants, particularly in spring when seedlings are small and slugs are active after rain. Net vulnerable plants with fine mesh (which also protects against aphids and carrot root fly). Organic wool pellets are effective and safe around children and wildlife. Go out with a torch on damp evenings and remove slugs by hand if the problem is severe.
What you will need to get started
A few things you do not need yet: a greenhouse (a windowsill works fine for year one), a complicated irrigation system, or expensive gadgets. The basics — a trowel, a watering can, compost, seeds, and labels — will take you a very long way.
Good seeds make a real difference. Suttons and Thompson-Morgan both offer broad ranges of UK-appropriate varieties with reliable germination rates. A mixed beginner packet of vegetable seeds is a great low-cost starting point if you are not sure what to choose. Browse seed varieties at Suttons or Thompson-Morgan.
Building from here
Once you have had a successful first year, the logical next steps are to expand your growing space, improve your soil further, and add crops that suit your cooking. The guide to improving your soil explains composting, soil types and long-term fertility in more detail — understanding your soil is the single biggest investment you can make in better crops.
Use the planting calendar to plan your whole growing year in one go — it shows what to sow, plant and harvest each month for every crop covered on this site. The raised bed planner helps you work out what will fit in your space and how to rotate crops from year to year.
In year two, consider adding crop rotation (growing different plant families in different beds each year to reduce disease and pest build-up), a cold frame or cloche for extending the season at both ends, and one or two more demanding crops you did not try in year one. Tomatoes grown well enough to make your own passata, or a row of French beans that kept you supplied all August — those are the moments that turn a beginner into a committed grower.
The most important thing is simply to begin. Make the bed, buy some seeds, sow a row of salad leaves and a courgette, and see what happens. You will learn more in one season of actually growing things than from any amount of reading — including this guide.
Key terms in this guide
- No-dig gardening
- — A way of gardening that avoids digging the soil. Instead you spread compost on the surface and let worms and weather work it in, protecting soil structure and suppressing weeds.
- Hardening off
- — Gradually acclimatising indoor-raised seedlings to outdoor conditions over 7–10 days before planting them out, so the shock of wind, sun and cold does not check or kill them.
- Tilth
- — The crumbly, fine texture of well-prepared topsoil — like coarse breadcrumbs — that seeds germinate and root into easily.
Useful tools for this
Frequently asked questions
What is the easiest vegetable for a complete beginner in the UK?
How much space do I need to start a vegetable garden?
When should I start a vegetable garden in the UK?
Do I need to dig up my lawn to grow vegetables?
How long before I get my first harvest?
Keep reading
Improving Your Soil: A Beginner's Guide
Find out what soil you have and improve it with compost, manure, mulch and no-dig — the simple UK guide to building rich, healthy ground that grows more.
How to Grow Tomatoes at Home in the UK
Beginner's guide to growing tomatoes in the UK — sowing, potting on, planting out, training cordons, watering, high-potash feeding and a heavy harvest.
How to Grow Potatoes in Bags and Beds
Grow your own potatoes in the UK — chitting, planting, earthing up, blight and harvesting first earlies and maincrop, in the ground or in containers.