🌱 Getting Started
DIY Garden Projects from Things You'd Throw Away
Easy DIY garden projects from household waste in the UK — plastic-bottle cloches and drip feeders, pallet planters, bird scarers and more, all for free.
Part of: Gardening for Free: Reuse and Recycle in the Garden
Some links on this page are affiliate links. If you buy through them we may earn a small commission, at no extra cost to you. We only recommend things we think are genuinely useful for home growers.
The short version
- Bottle cloches — cut the base off a clear two-litre bottle, push it over a seedling, and use the cap as a vent (March–May for tender crops like courgettes and beans).
- Self-watering bottles — sink a holed bottle by thirsty plants like tomatoes and courgettes, or spike a cap-holed one neck-down, to water steadily at the roots.
- Pallet projects — vertical planters and free compost bays, but only ever use heat-treated (HT/IPPC) pallets — never MB (methyl bromide) or stained, oily ones near food.
- Cardboard no-dig beds — lay plain brown card (tape and staples removed) over weeds, wet it, top with 8–10cm of compost, and plant straight in.
- Plant labels — cut yoghurt pots or milk bottles into strips and write in pencil, which won't fade in UV the way biro and felt-tip do.
- The main pitfall — clear bottles only (green/opaque cut light), and shiny bird scarers fade fast, so rely on netting and a wildlife-friendly garden instead.
Before you spend a penny on garden kit, take a proper look in your recycling bin. A two-litre fizzy-drink bottle, a clean milk carton, a few wooden pallets and the cardboard from your last delivery will do most of the jobs a beginner needs doing — cloches, drip feeders, planters, plant labels and weed-smothering mulch — for free. This guide rounds up the most genuinely useful projects, with honest notes on what works and what to skip.
It's all part of our wider take on how to reuse and recycle in the garden, so if you've not read that yet, start there for the full picture. Everything below is beginner-friendly, needs little more than scissors and a bradawl, and earns its place — no faff for the sake of it.
Plastic bottle cloches and propagators
The single most useful thing you can rescue from the recycling is a clear plastic bottle. A cloche is just a mini greenhouse that sits over a plant, trapping warmth and keeping the worst of the weather (and a good few slugs) off a young seedling. Shop-bought ones cost a few pounds each; yours costs nothing.
To make one, take a clear two-litre bottle, peel off the label and cut the bottom off cleanly with scissors. Pop the open end over a newly planted seedling and push the cut edge a couple of centimetres into the soil so it doesn't blow away. That's it — a working cloche in under a minute.
The cap is your vent. On a mild, sunny day the air inside can heat up fast and cook a tender plant, so unscrew the cap (or take it off entirely) to let warm, damp air escape. Screw it back on overnight if a cold snap is forecast. In a cold spring this little bit of cover can be the difference between a courgette plant that sulks and one that romps away.
When cloches earn their keep
Use bottle cloches from March to May for crops you've moved outside early — courgettes, squash, beans and tender salads. By June, when nights are reliably mild, most plants are big enough to manage without them. Lift them off before they restrict growth.
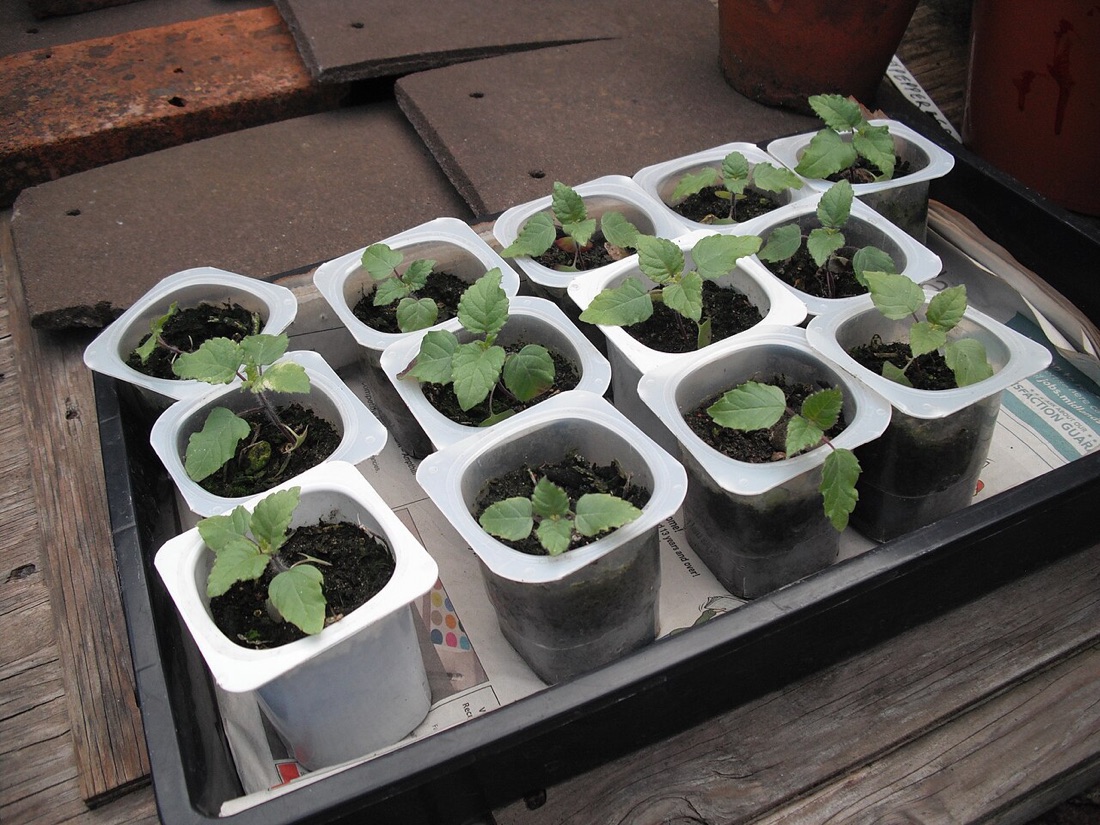
For raising seeds rather than protecting plants, the same bottle becomes a propagator. Cut a clear bottle in half, sow into a little compost in the bottom, and use the top half (cap on) as a humidity dome until the seeds germinate. It's the same idea as the trays in our guide to DIY seed pots, just with the lid built in.
A quick honesty note: clear bottles work far better than green or opaque ones, which cut the light a seedling needs. And bottle cloches are fiddly at scale — fine for a dozen plants, less so for a whole bed, where a proper cold frame makes more sense.
Plastic bottle drip and self-watering feeders
The same bottle that shelters a seedling in spring can water it in summer. Getting water down to the roots, slowly, beats splashing the surface — it encourages deeper rooting and wastes far less to evaporation. This is one of the best free wins in the whole reuse and recycle toolkit, especially for thirsty, fruiting crops.
There are two easy versions:
- The buried reservoir. Pierce six or eight small holes around the lower half of a two-litre bottle with a bradawl or a hot skewer. Sink it, cap-on, into the soil right beside a hungry plant when you plant out, leaving the neck poking above ground. Fill it from the watering can and the water seeps out at root depth over an hour or two. Brilliant next to tomatoes and courgettes, which both want steady, even moisture.
- The self-watering spike. Make a tiny hole in the bottle cap, fill the bottle, screw the cap back on and push it neck-first into the soil at an angle. The water drips out slowly through the cap. Cheaper than the terracotta watering spikes you'll see in the shops, and you can make one for every pot.
Steady water prevents split fruit and blossom end rot
Erratic watering — bone dry then a flood — is behind a lot of beginner heartache, including split tomatoes and the sunken brown patches of blossom end rot. A buried bottle that keeps the soil evenly moist genuinely helps. (It's a watering and calcium-uptake problem, by the way — not something eggshells will fix.)
Buried bottles are especially handy for growing food in containers, where pots dry out fast in hot weather and may need watering twice a day otherwise.
Milk-bottle scoops, funnels and labels
A clean plastic milk bottle (rinse it well — old milk turns rank quickly) is one of the most versatile things in the bin. With a single diagonal cut from the base up towards the handle, you get a sturdy compost scoop with a built-in grip: perfect for ladling potting compost into pots without buying a special tool.
Cut the bottle the other way and the top half, cap off, becomes a funnel for decanting compost, dry feed or homemade liquid feeds into narrow containers. Keep one by the wormery or bokashi caddy for pouring off the liquid feed.
You can also slice the flat sides of a milk bottle into rectangular plant labels — more on labels below. The plastic is soft enough to cut with scissors and weatherproof enough to last a season outdoors.
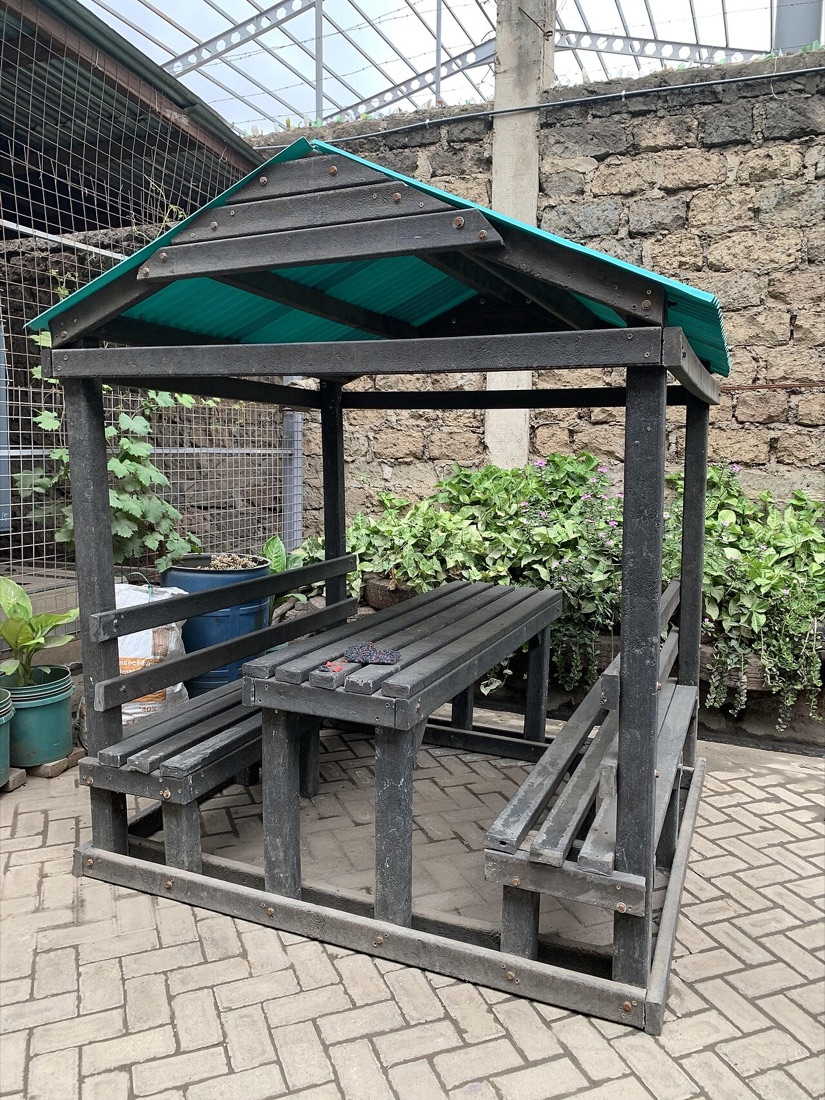
Pallet projects: planters, herb walls and compost bays
Wooden pallets are the gateway drug of garden upcycling. Free outside many shops and trade yards (always ask first), they're the raw material for vertical planters, herb walls, potting benches and — the classic — a three-sided compost bay.
A stood-upright pallet, backed and lined with weed-control fabric and filled with compost, makes a vertical planter for lettuce, strawberries and trailing herbs — a lot of growing in very little floor space. Lay three or four pallets on their sides, wire the corners together, and you've a compost bay that costs nothing; pair it with the method in how to make compost and you're away. A double bay (one to fill, one to mature) is even better.
Only use heat-treated (HT) pallets — never chemically treated
Look for the IPPC stamp on the side. HT means heat-treated — safe to use. Avoid any pallet stamped MB (methyl bromide), which is chemically treated with a fumigant you don't want near food crops, and skip unstamped pallets of unknown origin or any that are stained, oily or smell of chemicals. When in doubt, leave it. The same caution applies to all upcycled containers: never grow food in anything that held oils, paints, solvents or other chemicals, and be aware many growers avoid old tyres for edibles because of the ongoing debate about chemicals leaching from the rubber.
Pallet wood is rough, so wear gloves and watch for splinters and the odd protruding nail when you break one down. A crowbar and a bit of patience beat brute force.
Gentle bird deterrents from CDs and foil
Birds pulling at seedlings and pecking soft fruit is a real beginner frustration, and the recycling bin offers a kind first line of defence. Old CDs and DVDs, or strips of kitchen foil and milk-bottle-top discs, hung from canes or string flash and spin in the breeze, and the movement unsettles birds enough to keep them moving on. String a few above a newly sown bed or over your strawberry patch.
Be realistic, though: birds are clever and soon learn that a glinting disc never actually does anything. Shiny deterrents buy you a week or two, not a season — so move them about, take them down between uses, and rely on netting (well secured, so birds can't get tangled) for crops you really want to protect.
Honestly, the better long game is to work with the birds rather than against them. Blackbirds, robins and thrushes eat a huge number of slugs, snails and aphids, so a wildlife-friendly garden that welcomes them often has fewer pest problems overall. Net the strawberries, sure — but leave the rest of the garden open for business.
Cardboard for smothering weeds in no-dig beds
Plain brown cardboard is the unsung hero of the recycling bin. Laid over grass or weeds and topped with compost, it blocks light, kills off what's underneath and rots down into the soil — the simplest way to start a no-dig bed without lifting a spade.
The method is straightforward: clear any tall growth, lay cardboard over the area with the pieces overlapping generously so no light sneaks through the gaps, water it well, then pile 8–10cm of compost on top. The worms pull the softened cardboard down over the following months, and you plant straight into the compost. Our full guide to no-dig gardening walks through it step by step, and it pairs naturally with improving your soil over time.
Prep your cardboard properly
Use plain brown cardboard and peel off all tape, staples and plastic labels first — these don't break down. Avoid glossy, heavily printed or waxed card. Wetting the sheets as you lay them stops them blowing away and helps them knit into the soil. Big appliance boxes are gold for this.
The same cardboard, shredded, is a great "brown" to balance out grassy "greens" on the compost heap, so very little need go to the recycling lorry at all.
Plant labels from yoghurt pots and lolly sticks
Few things are more dispiriting than a tray of unlabelled seedlings you can no longer tell apart. The fix is in your kitchen. Cut a clean yoghurt pot, margarine tub or plastic milk bottle into long strips with one pointed end, and you've a stack of plant labels for nothing. Wooden lolly sticks and the wide sticks from ice creams work too, though they only last a season before they rot.
Write on them in pencil rather than biro or felt-tip — pencil doesn't fade in sunlight the way most inks do, and it rubs off cleanly with a damp cloth so you can reuse plastic labels year after year. A permanent marker works but ghosts in UV light by late summer.
It's a tiny project, but a properly labelled bed is the mark of a grower who knows what they're doing — and it saves you guessing whether that row is beans or weeds when the seedlings all look alike.
None of this needs a workshop or any real skill — just scissors, a bradawl, a pair of gloves and a habit of looking twice at what you're about to bin. Start with a few bottle cloches and a cardboard no-dig bed this season, and you'll quickly see how much of a garden you can build from things you'd otherwise throw away. For the bigger picture, head back to reuse and recycle in the garden, and for raising your own plants on the cheap, try DIY seed pots next.
Key terms in this guide
- No-dig gardening
- — A way of gardening that avoids digging the soil. Instead you spread compost on the surface and let worms and weather work it in, protecting soil structure and suppressing weeds.
Frequently asked questions
How do you make a mini cloche from a plastic bottle?
How do you water plants with a plastic bottle?
Keep reading
Gardening for Free: Reuse and Recycle in the Garden
How to garden for almost nothing in the UK — reuse household waste, make your own pots, feeds and compost, and cut the cost of growing your own food.
DIY Seed Pots from Household Waste
Make free seed pots and modules from household waste in the UK — toilet roll tubes, newspaper pots, egg boxes and more, plus which crops suit each.
Wildlife Gardening: How Nature Helps Your Veg Grow
How to garden for wildlife in the UK and grow more food — pollinators, natural pest control, ponds, bird feeders and bug hotels working for your veg patch.